Archipelag nad wodospadem: Różnice pomiędzy wersjami
| (Nie pokazano 10 wersji utworzonych przez 2 użytkowników) | |||
| Linia 4: | Linia 4: | ||
=== Historia === | === Historia === | ||
Archipelag nad wodospadem to druga mapa na [[Gildyjnych Polach Chwały]]. Została wprowadzona w grudniu 2021. Jest umieszczona na zapierającym dech w piersiach archipelagu małych wysp, które znajdują się na szczycie wielkiego wodospadu, w przeciwieństwie do skąpanych w ogniu skał z pierwszej mapy. | Archipelag nad wodospadem to druga mapa na [[Gildyjne Pola Chwały|Gildyjnych Polach Chwały]]. Została wprowadzona w grudniu 2021. Jest umieszczona na zapierającym dech w piersiach archipelagu małych wysp, które znajdują się na szczycie wielkiego wodospadu, w przeciwieństwie do skąpanych w ogniu skał z pierwszej mapy. | ||
=== Rozkład mapy === | === Rozkład mapy === | ||
| Linia 17: | Linia 17: | ||
[[FILE:GBGRewards6.png|center|link=]] | [[FILE:GBGRewards6.png|center|link=]] | ||
=== | ==== Nagrody Gildyjne==== | ||
{| | {| | ||
! style="text-align: center;" Rowspan="2" | | ! style="text-align: center;" Rowspan="2" | [[File:icon_rank.png|link=]]<br>Pozycja | ||
! style="text-align: center;" Colspan="2" | | ! style="text-align: center;" Colspan="2" | [[File:guild_battlegrounds_league_copper.png|75px|link=]]<br>Brązowa | ||
! style="text-align: center;" Colspan="2" | | ! style="text-align: center;" Colspan="2" | [[File:guild_battlegrounds_league_silver.png|75px|link=]]<br>Srebrna | ||
! style="text-align: center;" Colspan="2" | | ! style="text-align: center;" Colspan="2" | [[File:guild_battlegrounds_league_gold.png|75px|link=]]<br>Złota | ||
! style="text-align: center;" Colspan="2" | [[File:guild_battlegrounds_league_platinum.png|75px|link=]]<br>Platynowa | |||
! style="text-align: center;" Colspan="3" | [[File:guild_battlegrounds_league_diamond.png|75px|link=]]<br>Złota | |||
|- | |- | ||
! style="text-align: center;" | | ! style="text-align: center;" | [[File:icon_fragment.png|50px|link=]]<br>Fragmenty WSł | ||
! style="text-align: center;" | | ! style="text-align: center;" | [[File:clan_power.png|link=]]<br>Moc | ||
! style="text-align: center;" | | ! style="text-align: center;" | [[File:icon_fragment.png|50px|link=]]<br>Fragmenty WSł | ||
! style="text-align: center;" | | ! style="text-align: center;" | [[File:clan_power.png|link=]]<br>Moc | ||
! style="text-align: center;" | | ! style="text-align: center;" | [[File:icon_fragment.png|50px|link=]]<br>Fragmenty WSł | ||
! style="text-align: center;" | | ! style="text-align: center;" | [[File:clan_power.png|link=]]<br>Moc | ||
! style="text-align: center;" | [[File:icon_fragment.png|50px|link=]]<br>Fragmenty WSł | |||
! style="text-align: center;" | [[File:clan_power.png|link=]]<br>Moc | |||
! style="text-align: center;" | [[File:icon_fragment.png|50px|link=]]<br>Fragmenty WCz | |||
! style="text-align: center;" | [[File:icon_fragment.png|50px|link=]]<br>Fragmenty WSł | |||
! style="text-align: center;" | [[File:clan_power.png|link=]]<br>Moc | |||
|- | |- | ||
| style="text-align: left;" | 1 | | style="text-align: left;" | 1 [[File:113px-Reward_icon_guild_battlegrounds_chest_1.png|75px|link=]] | ||
| style="text-align: right;" | | | style="text-align: right;" | 50 | ||
| style="text-align: right;" | | | style="text-align: right;" | 54,600 | ||
| style="text-align: right;" | | | style="text-align: right;" | 100 | ||
| style="text-align: right;" | | | style="text-align: right;" | 163,800 | ||
| style="text-align: right;" | | | style="text-align: right;" | 125 | ||
| style="text-align: right;" | | | style="text-align: right;" | 273,000 | ||
| style="text-align: right;" | 150 | |||
| style="text-align: right;" | 382.200 | |||
| style="text-align: right;" | 3000 | |||
| style="text-align: right;" | 200 | |||
| style="text-align: right;" | 546.000 | |||
|- | |- | ||
| style="text-align: left;" | 2 | | style="text-align: left;" | 2 [[File:113px-Reward_icon_guild_battlegrounds_chest_2.png|75px|link=]] | ||
| style="text-align: right;" | | | style="text-align: right;" | 40 | ||
| style="text-align: right;" | | | style="text-align: right;" | 47.900 | ||
| style="text-align: right;" | | | style="text-align: right;" | 80 | ||
| style="text-align: right;" | | | style="text-align: right;" | 143,500 | ||
| style="text-align: right;" | | | style="text-align: right;" | 100 | ||
| style="text-align: right;" | | | style="text-align: right;" | 239,000 | ||
| style="text-align: right;" | 120 | |||
| style="text-align: right;" | 334,800 | |||
| style="text-align: right;" | 1000 | |||
| style="text-align: right;" | 160 | |||
| style="text-align: right;" | 478,200 | |||
|- | |- | ||
| style="text-align: left;" | 3 | | style="text-align: left;" | 3 [[File:113px-Reward_icon_guild_battlegrounds_chest_3.png|75px|link=]] | ||
| style="text-align: right;" | | | style="text-align: right;" | 38 | ||
| style="text-align: right;" | 43,300 | | style="text-align: right;" | 43,300 | ||
| style="text-align: right;" | | | style="text-align: right;" | 75 | ||
| style="text-align: right;" | | | style="text-align: right;" | 129,700 | ||
| style="text-align: right;" | | | style="text-align: right;" | 94 | ||
| style="text-align: right;" | | | style="text-align: right;" | 216,100 | ||
| style="text-align: right;" | 113 | |||
| style="text-align: right;" | 302,600 | |||
| style="text-align: right;" | 500 | |||
| style="text-align: right;" | 150 | |||
| style="text-align: right;" | 432,200 | |||
|- | |- | ||
| style="text-align: left;" | 4 | | style="text-align: left;" | 4 [[File:113px-Reward_icon_guild_battlegrounds_chest_4.png|75px|link=]] | ||
| style="text-align: right;" | | | style="text-align: right;" | 35 | ||
| style="text-align: right;" | 40,800 | | style="text-align: right;" | 40,800 | ||
| style="text-align: right;" | | | style="text-align: right;" | 70 | ||
| style="text-align: right;" | | | style="text-align: right;" | 122,300 | ||
| style="text-align: right;" | | | style="text-align: right;" | 88 | ||
| style="text-align: right;" | | | style="text-align: right;" | 203,000 | ||
| style="text-align: right;" | 105 | |||
| style="text-align: right;" | 285,200 | |||
| style="text-align: right;" | 0 | |||
| style="text-align: right;" | 140 | |||
| style="text-align: right;" | 407,400 | |||
|- | |- | ||
| style="text-align: left;" | 5 | | style="text-align: left;" | 5 [[File:113px-Reward_icon_guild_battlegrounds_chest_5.png|75px|link=]] | ||
| style="text-align: right;" | | | style="text-align: right;" | 33 | ||
| style="text-align: right;" | 40,400 | | style="text-align: right;" | 40,400 | ||
| style="text-align: right;" | | | style="text-align: right;" | 65 | ||
| style="text-align: right;" | | | style="text-align: right;" | 121,000 | ||
| style="text-align: right;" | | | style="text-align: right;" | 81 | ||
| style="text-align: right;" | | | style="text-align: right;" | 201,600 | ||
| style="text-align: right;" | 98 | |||
| style="text-align: right;" | 282,300 | |||
| style="text-align: right;" | 0 | |||
| style="text-align: right;" | 130 | |||
| style="text-align: right;" | 403,200 | |||
|- | |- | ||
| style="text-align: left;" | 6 | | style="text-align: left;" | 6 [[File:113px-Reward_icon_guild_battlegrounds_chest_6.png|75px|link=]] | ||
| style="text-align: right;" | | | style="text-align: right;" | 30 | ||
| style="text-align: right;" | 39,900 | | style="text-align: right;" | 39,900 | ||
| style="text-align: right;" | | | style="text-align: right;" | 60 | ||
| style="text-align: right;" | | | style="text-align: right;" | 119,700 | ||
| style="text-align: right;" | | | style="text-align: right;" | 75 | ||
| style="text-align: right;" | | | style="text-align: right;" | 199,000 | ||
| style="text-align: right;" | 90 | |||
| style="text-align: right;" | 279,300 | |||
| style="text-align: right;" | 0 | |||
| style="text-align: right;" | 120 | |||
| style="text-align: right;" | 399,000 | |||
|- | |- | ||
| style="text-align: left;" | 7 | | style="text-align: left;" | 7 [[File:113px-Reward_icon_guild_battlegrounds_chest_7.png|75px|link=]] | ||
| style="text-align: right;" | | | style="text-align: right;" | 28 | ||
| style="text-align: right;" | 39,500 | | style="text-align: right;" | 39,500 | ||
| style="text-align: right;" | | | style="text-align: right;" | 55 | ||
| style="text-align: right;" | | | style="text-align: right;" | 118,500 | ||
| style="text-align: right;" | | | style="text-align: right;" | 69 | ||
| style="text-align: right;" | | | style="text-align: right;" | 197,400 | ||
| style="text-align: right;" | 83 | |||
| style="text-align: right;" | 276,400 | |||
| style="text-align: right;" | 0 | |||
| style="text-align: right;" | 110 | |||
| style="text-align: right;" | 394,800 | |||
|- | |- | ||
| style="text-align: left;" | 8 | | style="text-align: left;" | 8 [[File:113px-Reward_icon_guild_battlegrounds_chest_8.png|75px|link=]] | ||
| style="text-align: right;" | | | style="text-align: right;" | 25 | ||
| style="text-align: right;" | 39,100 | | style="text-align: right;" | 39,100 | ||
| style="text-align: right;" | | | style="text-align: right;" | 50 | ||
| style="text-align: right;" | | | style="text-align: right;" | 117,200 | ||
| style="text-align: right;" | | | style="text-align: right;" | 63 | ||
| style="text-align: right;" | | | style="text-align: right;" | 195,300 | ||
| style="text-align: right;" | 75 | |||
| style="text-align: right;" | 273,500 | |||
| style="text-align: right;" | 0 | |||
| style="text-align: right;" | 100 | |||
| style="text-align: right;" | 390,600 | |||
| style="text-align: right;" | | |||
| style="text-align: right;" | | |||
| style="text-align: right;" | | |||
| style="text-align: right;" | | |||
| style="text-align: right;" | | |||
|} | |} | ||
==== Wielki Słoń ==== | |||
Wielki Słoń to budynek 4x3 z możliwością rozbudowy do 8 poziomu. Wraz z jego rozbudową otrzymasz różne bonusy, w tym: bonus do produkcji monet, Punkty Rozwoju, a także towary do skarbca gildii i wzrost mocy gildii! Wreszcie, co najważniejsze, istnieje również premia do ataku dla atakujących armii! | |||
Na ósmym i ostatnim poziomie, gracze staną przed wyborem. Wybór, który odzwierciedla różnorodność ról pełnionych przez słonie na przestrzeni wieków. Czy zdecydujecie się zatrudnić swojego Wielkiego Słonia w bitwie, handlu czy wsparciu? Z tymi trzema rozgałęziającymi się wyborami; decyzja jest w dużej mierze w Waszych rękach! | |||
Wielki Słoń to specjalny budynek przyznawany jako nagroda na mapie [[Archipelag nad wodospadem]] Gildyjnych Pól Chwały. | |||
| Linia 194: | Linia 158: | ||
! style="text-align: center; width: 20%;" | [[Wielki słoń – poz. 3]] | ! style="text-align: center; width: 20%;" | [[Wielki słoń – poz. 3]] | ||
! style="text-align: center; width: 20%;" | [[Wielki słoń – poz. 4]] | ! style="text-align: center; width: 20%;" | [[Wielki słoń – poz. 4]] | ||
|- | |- | ||
| | | [[File:R SS MultiAge Battlegrounds3a-c536ec96b.png|250px|link=]] | ||
| | | [[File:R_SS_MultiAge_Battlegrounds3b-e60a42ba8.png|250px|link=]] | ||
| | | [[File:R SS MultiAge Battlegrounds3c-9996687b5.png|250px|link=]] | ||
| | | [[File:R_SS_MultiAge_Battlegrounds3d-bf9b9c730.png|250px|link=]] | ||
|} | |} | ||
{| | {| | ||
| Linia 205: | Linia 169: | ||
! style="text-align: center; width: 20%;" | [[Wielki słoń – poz. 7]] | ! style="text-align: center; width: 20%;" | [[Wielki słoń – poz. 7]] | ||
|- | |- | ||
| | | [[File:R_SS_MultiAge_Battlegrounds3e-586752e27.png|250px|link=]] | ||
| | | [[File:R_SS_MultiAge_Battlegrounds3f-dbee7a066.png|250px|link=]] | ||
| | | [[File:R_SS_MultiAge_Battlegrounds3g-9b8bb1589.png|250px|link=]] | ||
|} | |} | ||
{| | {| | ||
! style="text-align: center; width: 20%;" | [[ | ! style="text-align: center; width: 20%;" | [[Słoniowy bazar]] | ||
! style="text-align: center; width: 20%;" | [[ | ! style="text-align: center; width: 20%;" | [[Słoniowa cytadela]] | ||
! style="text-align: center; width: 20%;" | [[ | ! style="text-align: center; width: 20%;" | [[Słoniowy pałac]] | ||
|- | |- | ||
| | | [[File:R_SS_MultiAge_Battlegrounds3hBazaar-8e5e1975e.png|300px|link=]] | ||
| | | [[File:R_SS_MultiAge_Battlegrounds3hCitadel-a79785256.png|300px|link=]] | ||
| | | [[File:R_SS_MultiAge_Battlegrounds3hRoyalty-ad9739d1d.png|300px|link=]] | ||
|} | |} | ||
==== Opalizujący ogród ==== | |||
Dodatek do łańcucha budynków - Opalizujący ogród | |||
możecie stworzyć jeden z trzech możliwych wyglądów budynku i wzmocnić statystyki swojego Wielkiego Słonia! | |||
{| | {| | ||
! style="text-align: center;" Colspan="3" |[[Opalizujący | ! style="text-align: center;" Colspan="3" |[[Opalizujący ogród]] | ||
|- | |- | ||
! style="text-align: center;" |[[File:D SS MultiAge Battlegrounds4.png]] | ! style="text-align: center;" |[[File:D SS MultiAge Battlegrounds4.png]] | ||
! style="text-align: center;" |[[File:D SS MultiAge Battlegrounds4b.png]] | ! style="text-align: center;" |[[File:D SS MultiAge Battlegrounds4b.png]] | ||
! style="text-align: center;" |[[File:D SS MultiAge Battlegrounds4c.png]] | ! style="text-align: center;" |[[File:D SS MultiAge Battlegrounds4c.png]] | ||
|- | |- | ||
! style="text-align: center;" Colspan="3" | | ! style="text-align: center;" Colspan="3" | Po podłączeniu zapewnia premię do zadowolenia, premię do obrony dla atakującego, 3 towary, 1 Punkt Rozwojui. | ||
|- | |- | ||
|} | |} | ||
==== Nagrody | Ważne wskazówki - Ponieważ jest to budynek łańcuchowy, musi być połączony z Wielkim Słoniem, aby otrzymać pewne premie. | ||
==== Nagrody indywidualne ==== | |||
Oprócz nagród dla gildii, istnieją również nagrody indywidualne, za każdym razem, gdy wnosisz wkład w walkę lub negocjacje, istnieje szansa na wygraną [[Punkty Rozwoju|Punktów Rozwoju]], [[Towary|Towarów]], [[Jednostki|Jednostek]], [[Zaopatrzenie|Zaopatrzenia]] lub nawet [[Diamenty|Diamentów]]. | |||
<br><br> | |||
'''Note:''' W 40% przypadków natychmiastową nagrodą będzie jeden fragment Zestawu wielkiego słonia lub w Diamentowej Lidze 15% za 3 fragmenty i 25% za jeden fragment Terenów turniejowych. | |||
<br><br> | |||
Aktualna wersja na dzień 19:47, 29 wrz 2023
Historia
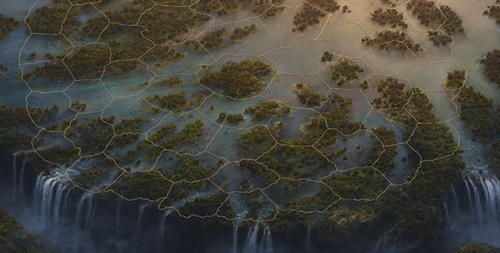
Archipelag nad wodospadem to druga mapa na Gildyjnych Polach Chwały. Została wprowadzona w grudniu 2021. Jest umieszczona na zapierającym dech w piersiach archipelagu małych wysp, które znajdują się na szczycie wielkiego wodospadu, w przeciwieństwie do skąpanych w ogniu skał z pierwszej mapy.
Rozkład mapy
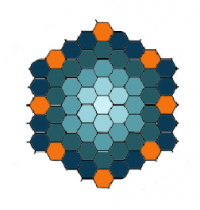
Mapa jest w zasadzie tego samego rozmiaru co poprzednia, ale tutaj sektory są zbliżone do sześciokątów, przez co zwiększa się poziom trudności, ponieważ niektóry z nich mogą być atakowane nawet z 6 stron.
Nagrody
Możesz otrzymać natychmiastowe, tymczasowe i stałe nagrody na Polach Chwały. Po każdej walce lub negocjacjach istnieje szansa na zdobycie Punktów Rozwoju, Jednostek, premii dla atakujących, Towarów, Diamentów i fragmentów Wielkiego słonia. Jakość nagród zależy od ligi, w której się znajdujesz! Twoja gildia może zdobyć punkty ligowe w zależności od aktualnej ligi, jednak należy pamiętać, że można je również stracić. Są jednak również stałe nagrody dla Ciebie i Twojej gildii: Gildie otrzymają potencjał zgodnie z ich zajmowanym miejscem na polu chwały (ilość również przelicza się w zależności od ligi), a także możesz zdobyć fragmenty zestawu Wielkiego słonia.

Nagrody Gildyjne
Pozycja |
 Brązowa |
 Srebrna |
 Złota |
 Platynowa |
 Złota | ||||||
|---|---|---|---|---|---|---|---|---|---|---|---|
Fragmenty WSł |
Moc |
Fragmenty WSł |
Moc |
Fragmenty WSł |
Moc |
Fragmenty WSł |
Moc |
Fragmenty WCz |
Fragmenty WSł |
Moc | |
| 1 |
50 | 54,600 | 100 | 163,800 | 125 | 273,000 | 150 | 382.200 | 3000 | 200 | 546.000 |
| 2 |
40 | 47.900 | 80 | 143,500 | 100 | 239,000 | 120 | 334,800 | 1000 | 160 | 478,200 |
| 3 |
38 | 43,300 | 75 | 129,700 | 94 | 216,100 | 113 | 302,600 | 500 | 150 | 432,200 |
| 4 |
35 | 40,800 | 70 | 122,300 | 88 | 203,000 | 105 | 285,200 | 0 | 140 | 407,400 |
| 5 |
33 | 40,400 | 65 | 121,000 | 81 | 201,600 | 98 | 282,300 | 0 | 130 | 403,200 |
| 6 |
30 | 39,900 | 60 | 119,700 | 75 | 199,000 | 90 | 279,300 | 0 | 120 | 399,000 |
| 7 |
28 | 39,500 | 55 | 118,500 | 69 | 197,400 | 83 | 276,400 | 0 | 110 | 394,800 |
| 8 |
25 | 39,100 | 50 | 117,200 | 63 | 195,300 | 75 | 273,500 | 0 | 100 | 390,600 |
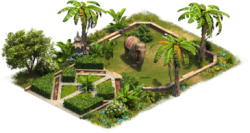
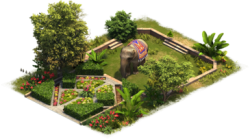
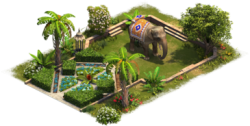
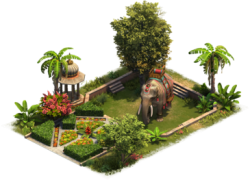
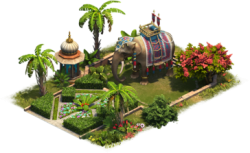
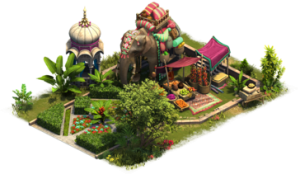
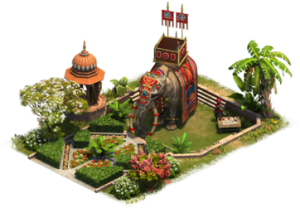
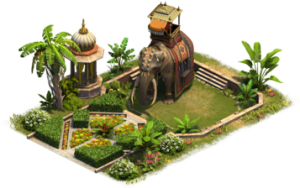
Wielki Słoń
Wielki Słoń to budynek 4x3 z możliwością rozbudowy do 8 poziomu. Wraz z jego rozbudową otrzymasz różne bonusy, w tym: bonus do produkcji monet, Punkty Rozwoju, a także towary do skarbca gildii i wzrost mocy gildii! Wreszcie, co najważniejsze, istnieje również premia do ataku dla atakujących armii!
Na ósmym i ostatnim poziomie, gracze staną przed wyborem. Wybór, który odzwierciedla różnorodność ról pełnionych przez słonie na przestrzeni wieków. Czy zdecydujecie się zatrudnić swojego Wielkiego Słonia w bitwie, handlu czy wsparciu? Z tymi trzema rozgałęziającymi się wyborami; decyzja jest w dużej mierze w Waszych rękach!
Wielki Słoń to specjalny budynek przyznawany jako nagroda na mapie Archipelag nad wodospadem Gildyjnych Pól Chwały.
| Wielki słoń – poz. 1 | Wielki słoń – poz. 2 | Wielki słoń – poz. 3 | Wielki słoń – poz. 4 |
|---|---|---|---|
|
|
|
|
| Wielki słoń – poz. 5 | Wielki słoń – poz. 6 | Wielki słoń – poz. 7 |
|---|---|---|
|
|
|
| Słoniowy bazar | Słoniowa cytadela | Słoniowy pałac |
|---|---|---|
|
|
|
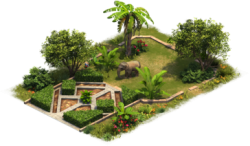
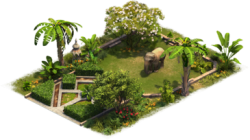
Opalizujący ogród
Dodatek do łańcucha budynków - Opalizujący ogród
możecie stworzyć jeden z trzech możliwych wyglądów budynku i wzmocnić statystyki swojego Wielkiego Słonia!
| Opalizujący ogród | ||
|---|---|---|

|

|

|
| Po podłączeniu zapewnia premię do zadowolenia, premię do obrony dla atakującego, 3 towary, 1 Punkt Rozwojui. | ||
Ważne wskazówki - Ponieważ jest to budynek łańcuchowy, musi być połączony z Wielkim Słoniem, aby otrzymać pewne premie.
Nagrody indywidualne
Oprócz nagród dla gildii, istnieją również nagrody indywidualne, za każdym razem, gdy wnosisz wkład w walkę lub negocjacje, istnieje szansa na wygraną Punktów Rozwoju, Towarów, Jednostek, Zaopatrzenia lub nawet Diamentów.
Note: W 40% przypadków natychmiastową nagrodą będzie jeden fragment Zestawu wielkiego słonia lub w Diamentowej Lidze 15% za 3 fragmenty i 25% za jeden fragment Terenów turniejowych.